Soldering Tips From Experience
Soldering is an indispensable skill for countless fields of interest, from electric luthierie to car repair. While I am not a master at soldering, I hope by sharing what I have learned I may help beginners struggling to solder clean joints.
Safety
Soldering can be a dangerous activity. There are high temperatures and toxic fumes involved, but with proper precautions, most health risks can be minimized.
As a disclaimer, I am not a medical expert and take no liability for any injuries you may sustain from following (or not following) these safety tips.
Ventilate your workspace. Rosin flux fumes can cause occupational asthma1.
Beware of residual lead on your hands. Do not eat and drink while soldering, and wash your hands afterwards. Failing to do so can result in accidental ingestion of lead. Note that even thorough hand-washing is not completely effective at removing lead2.
Wear eye protection. Solder can ‘spit’, flinging molten tin into the air3.
This is not the entire extent of all the safety precautions you should follow! Be sure to conduct further research about how to keep yourself safe while soldering. Additionally, further safety tips throughout the post will be in bold.
With that out of the way…
Iron
You don’t need a fancy, expensive soldering station to make clean joints. I personally use a $10 soldering iron (which included tips and solder!).
Solder
You have two main choices for solders: leaded (SnPb) and unleaded (RoHS).
There is quite a debate about the health effects of both options. The general consensus is that unleaded solder is safer than leaded solder4. Although some proponents of leaded solder say otherwise, I have not found a reputable source to verify these claims.
Note that with both leaded and unleaded solder, the primary hazard is flux fumes, not metal fumes. The temperatures involved in soldering are not high enough to vaporize the metal constituents5.
Leaded solder is a lot easier to work with than unleaded solder—it melts at lower temperatures, flows better, and solidifies into stronger joints. Additionally, RoHS solders composed of pure tin can form whiskers, thin filaments of tin which can cause shorts between joints. Leaded solder is also easier on your wallet; alternative metals used in RoHS solders are typically much more expensive than lead.
Personally, I use 60% tin, 40% lead solder. It’s the only composition of leaded solder I’ve used. I’ve found no problems with it so far, so why switch?
Cleaning
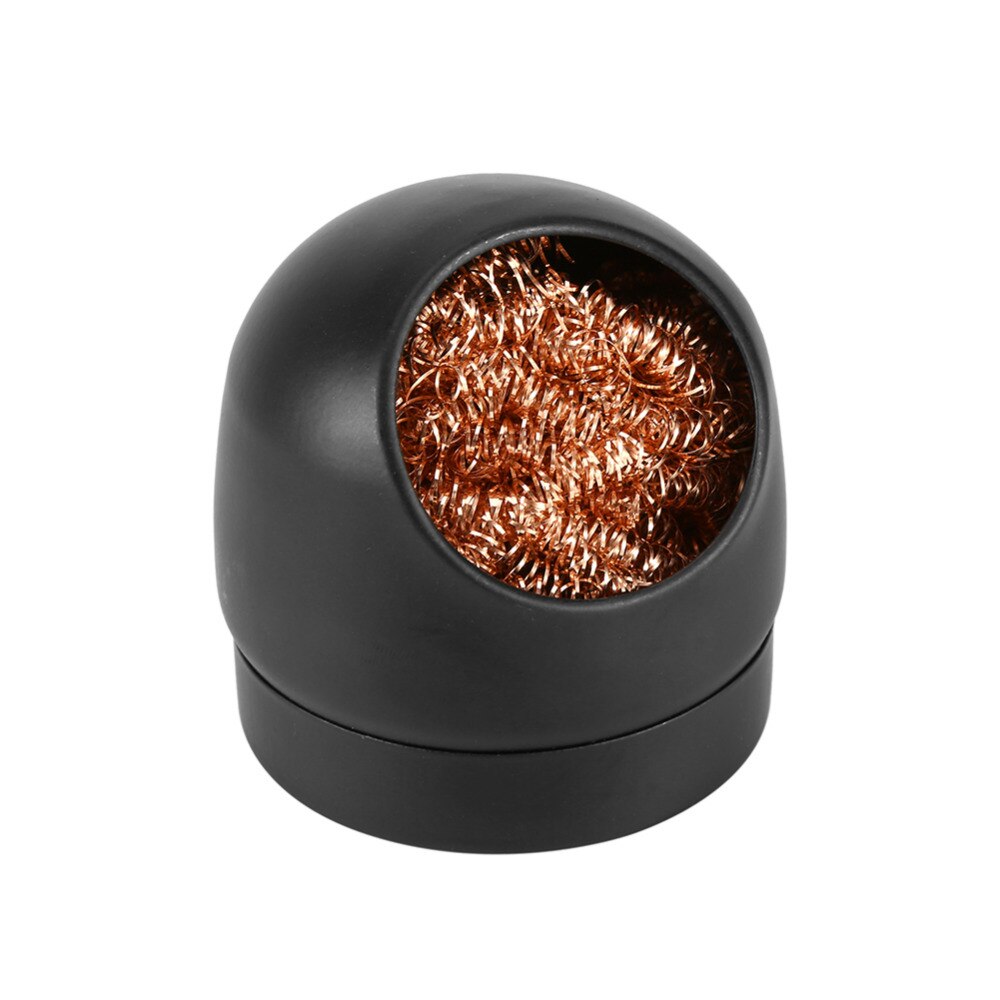
You should clean and tin your iron every few joins you solder. There are two main cleaning options available: a good ol’ damp sponge, or a fancy wire coil cleaner.
I use a sponge; they’re cheap and simple. They do have the unfortunate side effect of sucking heat from your iron. If you notice your soldering iron is making cold joints after cleaning your tip, try turning up the temperature.
Some claim there is a risk of inhaling lead solder dust when using a wire soldering iron cleaner6 as pictured below.
Flux
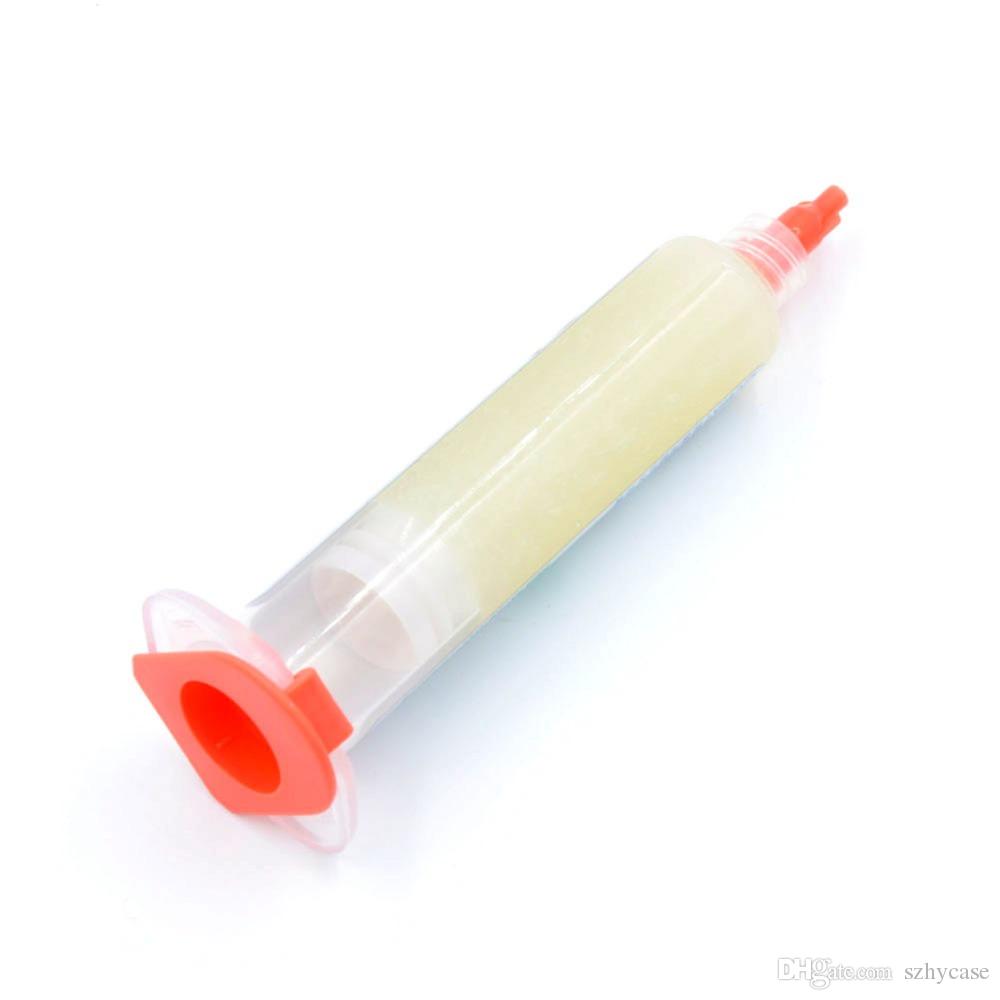
Do not be misled; although solder wire may advertise a rosin flux core, it is an inadequate amount to facilitate easy flow onto a joint. Rosin core in solder wire only promotes adhesion to the iron itself—additional flux is required for solder to flow smoothly on a joint.
I strongly endorse tacky no-clean gel flux. It is typically sold in syringes for easy application, which is appropriate, as you should apply it liberally and often to your joints.
Tips
Before even turning on the iron, you need to pick a suitable tip. The best tip is usually the biggest one you can manipulate deftly within your workspace. Flat ends or curves on a tip create a large surface area to transfer heat with, which helps heat a joint more quickly.
I use a large double-flat tip with a blunted point, so I have three flat surfaces to transfer heat with. It looks a little like this:
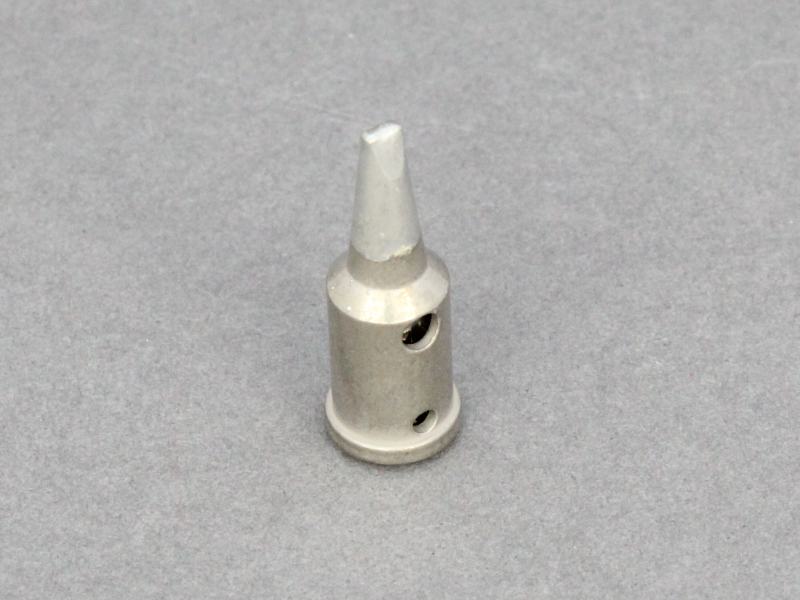
If you opt to use a smaller tip, you may have to turn up your irons temperature to hasten heat transfer.
Tinning
Tinning is the process of melting solder against the tip of an iron. It helps protect the iron from oxidation, which reduces thermal conductivity of the iron and prevents solder from sticking to the tip. Always make sure to tin your tip before first use and before turning off your iron.
Temperature
When I first started soldering, I made the mistake of thinking that the hotter my iron was, the easier soldering would be.
While it’s true solder will melt faster, a hotter iron also leads to faster oxidation of tips, overheated joints, and possible damage of nearby components (usually plastics) from radiant heat. Melting plastics (and other materials) can release toxic fumes. Try to keep the iron temperatures under 450 degrees Celsius to prevent this5.
I typically set my iron to 250–300 degrees Celsius. It’s more than hot enough to melt leaded solder, and just hot enough to melt unleaded solder—but not so hot that it starts to melt nearby plastics.
After you turn on your iron, let it sit for a few minutes (under a watchful eye, of course) to fully heat up.
Know When to Fold’em
A soldering iron won’t always work for your project. For example, you might be able to get away with soldering a chip onto a motherboard with a soldering iron, but to desolder chips cleanly without bending any pins, you’ll need to use a heat gun. I’ve had the (mis?)fortune of learning this from experience…
Sometimes, you might have to swallow your ego and admit you aren’t skilled enough for an exceptionally difficult job. There’s less shame in conceding you don’t know how to do something right at the moment than doing it wrong and breaking something.
https://www.cmu.edu/ehs/Laboratory-Safety/chemical-safety/documents/ehs-guideline---soldering-safety.pdf ↩︎
https://safety.eng.cam.ac.uk/safe-working/copy_of_soldering-safety ↩︎
https://eta-safety.lbl.gov/sites/default/files/Soldering%20Guidelines.pdf ↩︎ ↩︎
Wire coil cleaners work by turning solder into dust, and breathing lead dust is dangerous ↩︎