Running Red vs Blue Exercises with Proxmox
I’ve found there’s no better way for blue teamers to gain active defense experience than to do “live fire” exercises against a red team. I’m usually pretty hard on the blue teamers in these exercises. They are given admin credentials to a network of vulnerable boxes they’ve usually never seen before. In 30 minutes, they have to document the systems, backup critical data, install tools, patch vulnerabilities, and set up monitoring and response platforms. After their time is up, red team goes all out to take down blue team’s services. I informally monitor uptime to keep tabs on how each team is performing. It’s tons of fun to be the middleman between the two teams and see how they get on each other’s nerves.
I set this system up after I failed to find a good commercial solution for active defense training. I decided I’d have to self-host it. For my goals–a large number of novel systems and vulnerabilities–it made the most sense to host each machine on Proxmox, a hypervisor using Linux KVMs under the hood. Proxmox is great, but it only solves half the problem. The hardest part is finding and configuring VMs.
Finding Boxes
VulnHub is a fantastic repository of vulnerable user-submitted VM’s to practice penetration testing on. However, none of them will work out-of-the-box with this use case. Nearly all of the boxes use VirtualBox’s OVA format or VMWare’s VMDK format, while Proxmox prefers QCOW. Additionally, blue team needs to be able to log in as root over SSH to secure the box, and most VMs don’t provide the root password or have root login over SSH configured at all.
I’ll be using Jangow to demonstrate how to configure VulnHub VMs for Proxmox, as it exemplifies a lot of issues I’ve encountered. Not every VM is fixable, but I’ve had good luck with Thales and Potato as well.
Microsoft also makes Windows Enterprise Evaluation VMs
available for download
here.
At the time of writing this, that’s Windows 11. They have a
baked-in expiration date, after which they’re unusable. If
you spoof the time, a lot of Windows authentication methods
that rely on the timestamp break, but you can use programs
like rdate or ntpdate. I haven’t personally set up any
Windows VMs for Red vs Blue, but I would guess that the
easiest way to do so would be to write a script to pull the
newest VM, convert it to QCOW, apply the vulnerabilities you
want, then upload it to Proxmox.
I have heard of a way to upgrade the VM with DISM to a regular Enterprise trial edition with no time limit, but I’ve yet to test that. I’ll probably make another post about that when I get around to it.
If that sounds like too much work (I sure think it is),
there is a project called Game of Active
Directory that
simulates a two-forest, three-domain network. You can edit
the credentials of all the machines to your heart’s content
in the ad/GOAD/data/config.json file. The best part is
that GOAD has a Proxmox
installation
option! It seems to be the best self-hosted Windows AD
environment out there–I’m working on setting it up for my
own red and blue teams.
Testing Boxes
Like I mentioned earlier, not all VMs will work. That doesn’t mean that everything needs to be green when it starts up, just that it boots to the TTY login. You can VMs quickly on your own machine using the fantastic KVM frontend, Virt Manager. But first, you need to convert the OVA/VMDK to QCOW, because that’s what works best with KVM.
Convert from OVA
$ file jangow-01-1.0.1.ova
jangow-01-1.0.1.ova: POSIX tar archive
If you run file on an OVA file, you’ll see that it’s actually a tar archive. Extract it.
$ tar xaf jangow-01-1.0.1.ova
$ ls
jangow-01-1.0.1.ova
'jangow 01-disk001.vmdk'
'jangow 01.mf'
'jangow 01.ovf'
The OVA archive contains three files. The .mf is a
manifest file that contains hashes of the other two files.
The .ovf is an XML document that describes the virtualized
hardware format of the VM, and the .vmdk is the actual
disk image of the VM. Notice that OVA uses VMWare’s VMDK
format under the hood!
You’ll need to convert the VMDK file to a QCOW2 file using
one of QEMU’s tools. You can name the output file whatever
you like; I chose myjangow.qcow2.
$ qemu-img convert -f vmdk jangow\ 01-disk001.vmdk -O qcow2 myjangow.qcow2
Convert from VMDK
VMWare images are usually provided with the manifest, virtualization format, and disk images separately, so you can skip straight to converting the VMDK to a QCOW2 file.
$ qemu-img convert -f vmdk jangow\ 01-disk001.vmdk -O qcow2 myjangow.qcow2
Testing with Virt Manager
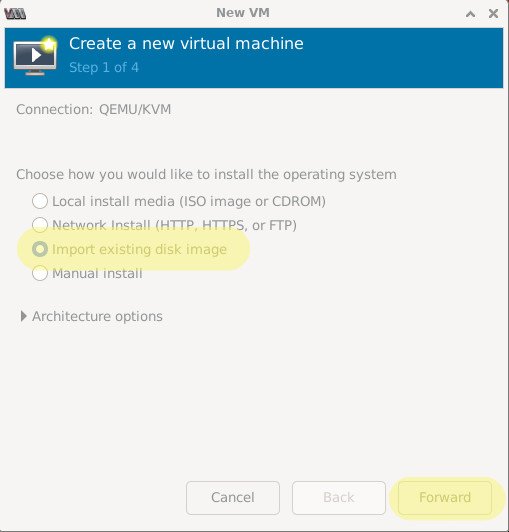
With the QCOW2 file prepared, you can test it with Virt Manager. Start by clicking “Create new virtual machine”.
Select “Import existing disk image” and click “Forward”.
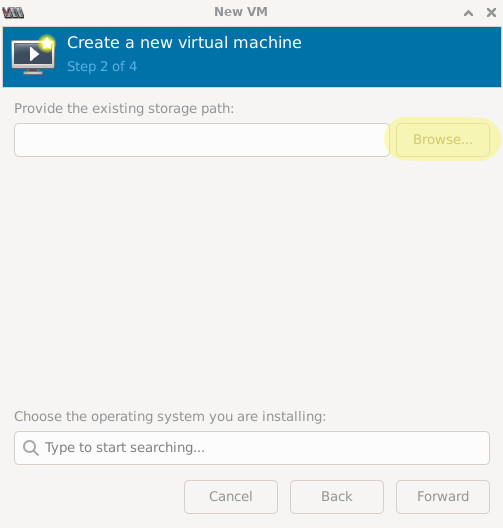
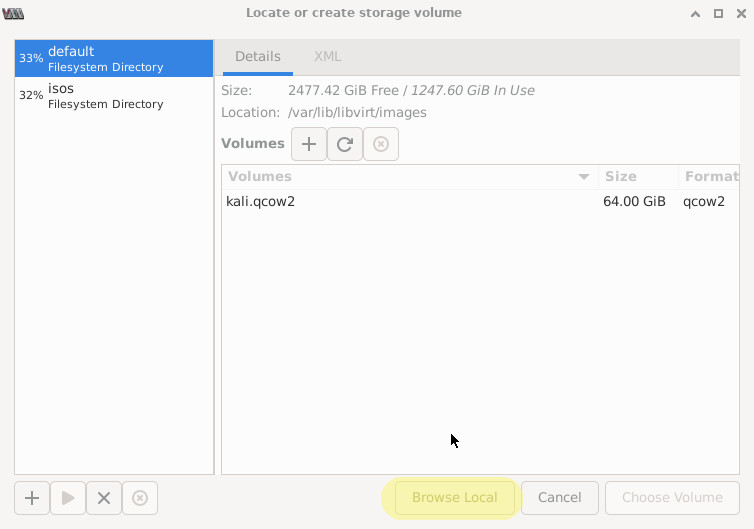
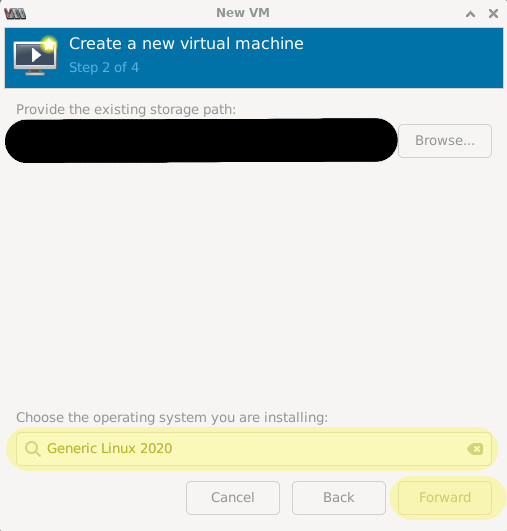
Click “Browse”, “Browse Local” then navigate to and select your QCOW2 file.
Search for the operating system on the VM image. “Generic Linux 2020” works well for older Linux VMs. Click “Forward”.
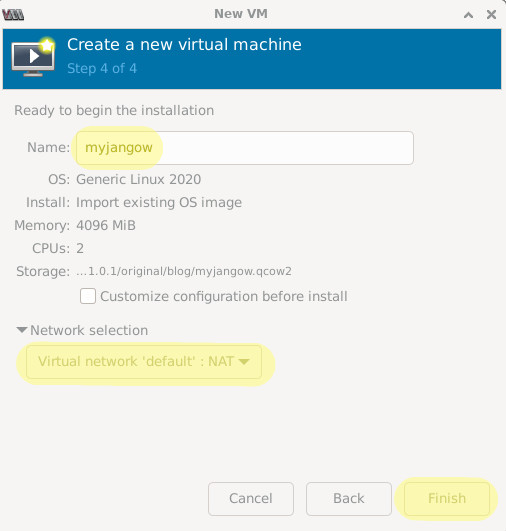
You can name it whatever you’d like. The default network selection works fine for this use case.
The VM will (hopefully) boot. Notice that the network interfaces failed to start. That’s alright!
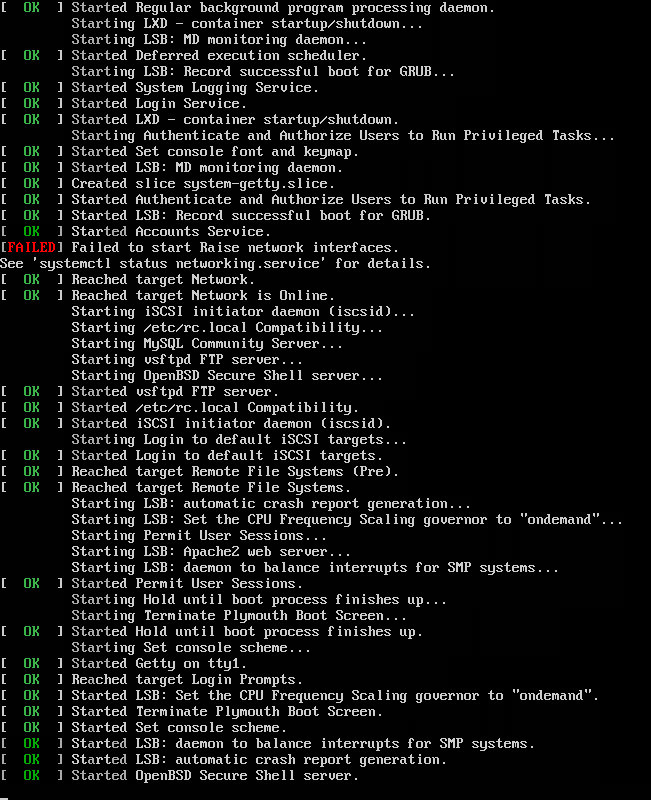
What’s important is that you can access the TTY login.
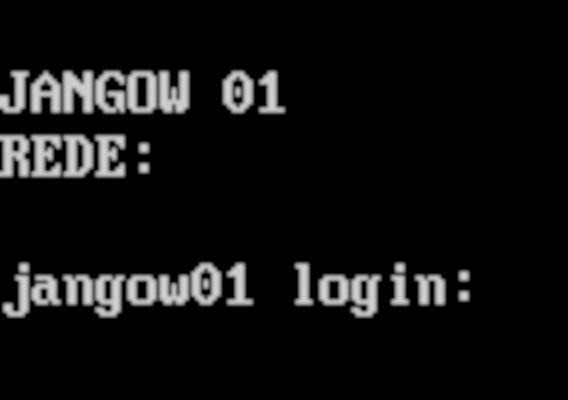
Fantastic! Now that it works, you can shutdown the VM and edit the disk image to change the root password.
Editing the Disk Image
Mounting the Disk Image
Now that you’ve verified the VM works, you need to mount the
disk image and edit the files. Before you do this, you
should back up the original disk image, as any changes you
make to the mounted filesystem will be written automatically
to the disk image. QEMU supports the Network Block Device
(NBD) protocol for mounting QCOW images as a filesystem, but
first you need to enable the nbd kernel module.
$ sudo modprobe nbd
If you run lsblk, you’ll notice a number of NBD virtual
devices have been created. Connect the .qcow2 file to a
Network Block Device.
$ sudo qemu-nbd --connect=/dev/nbd0 myjangow.qcow2
Use lsblk to find the main partition of the disk image.
It’s probably the biggest one–/dev/nbd0p1 in this case.
If you’re unsure, you can use sudo fdisk -l /dev/nbd0 to
find more information.
$ lsblk
NAME        MAJ:MIN RM  SIZE RO TYPE MOUNTPOINTS
nbd0         43:0    0   12G  0 disk
├─nbd0p1     43:1    0   11G  0 part
├─nbd0p2     43:2    0    1K  0 part
└─nbd0p5     43:5    0 1022M  0 part
Now mount the partition to a directory of your choice.
$ mkdir mnt
$ sudo mount /dev/nbd0p1 mnt/
All the regular Linux root subdirectories are there. Any changes you make to the mounted filesystem will be written to the disk image.
$ ls mnt/
bin
boot
dev
etc
home
initrd.img
lib
lib64
...
Changing the Root Password
You need to manually change the root password in
etc/shadow. Look at the existing hash to find out what
format it is.
$ sudo cat mnt/etc/shadow
root:$6$PXrwbBNh$ny.JBjNHDzDnp9r74A5IgGGDhAg4GuJCH2CppO3CkVj0eeQefEVUD.L9j.KlQisKloO9ne454GyJTQHdlCaYf1:18931:0:99999:7:::
You can use mkpasswd to generate a valid replacement hash.
You must match the hash format with the format of the
existing hash for it to work. You can provide the hashing
method to mkpasswd with the -m flag. Here’s a list of
hash formats and their corresponding -m option.
$y$: yescrypt$gy$: gost-yescrypt$7$: scrypt$2b$: bcrypt$2a$: bcrypt-a$6$: sha512crypt$5$: sha256crypt$md5: sunmd5$1$: md5crypt_: bsdicrypt- (no prefix): descrypt
$3$: nt
The root hash for Jangow uses SHA-512. Match that when generating a new password. In this example, I set the password to “root”, same as the username. You should do this too. You can always change it later, but it helps avoid issues if you’re working on a VM with a keymap that doesn’t match your own. Sometimes you have to poke around to find out what keys will actually type “root” and it’s convenient if you don’t have to do any blind guesses for how the password might be typed.
$ mkpasswd -m sha512crypt root
$6$Dkwj1z0bw20yjo3C$A.gSOXnjYmTeRDd40n12NYtLmd7lO216WHypIt5VMjbSmjmNdV0Ze9dX7QxQYG5wZvd8nHPPmpdkuR8ndHIUT0
Even when given the same password, the hash will be different every time because of the random salt added.
Replace the hash in mnt/etc/shadow with the one you
generated and save the file.
Unmounting the Disk Image
With the password change in place, you need to unmount the disk image and disconnect the Network Block Device.
$ sudo umount -r mnt/
$ sudo qemu-nbd --disconnect /dev/nbd0
You may also remove the NBD kernel module if you wish.
sudo rmmod nbd
Installing into Proxmox
This guide assumes you have Proxmox already installed and ready to go on a server. If you need to install it, follow this guide.
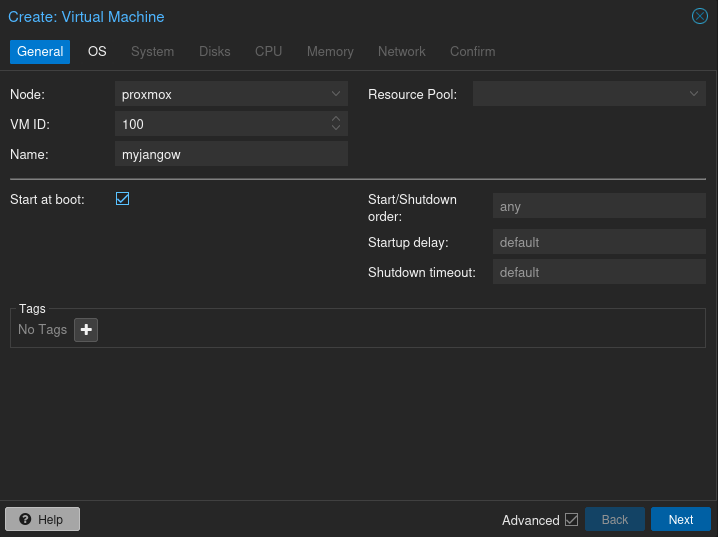
Connect to the web interface over port 8006 and select “Create VM”

You can name it whatever you like, as long as there’s no spaces. Take note of the VM ID–you’ll need it for later. I also enable “Start at boot” in the advanced settings.
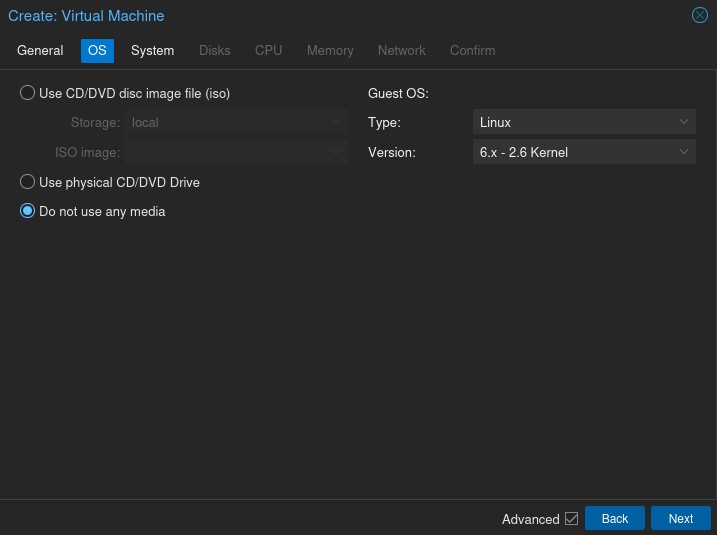
Select “Do not use any media” in OS settings. You’ll manually attach the disk image later.
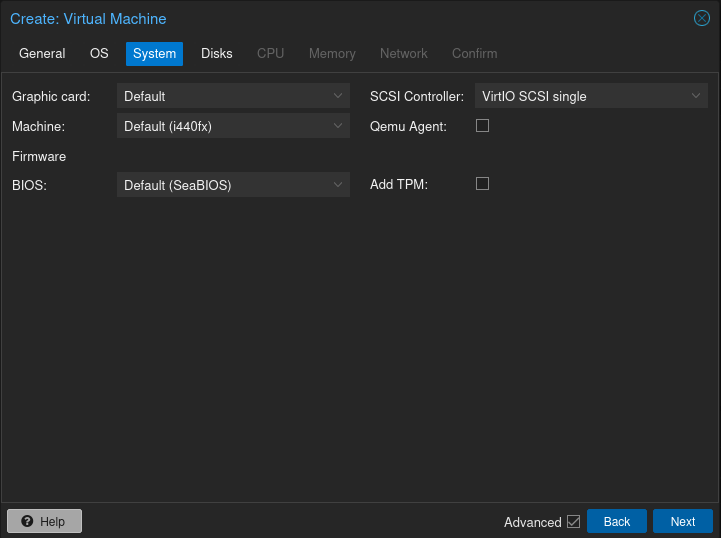
I keep the system settings the same.
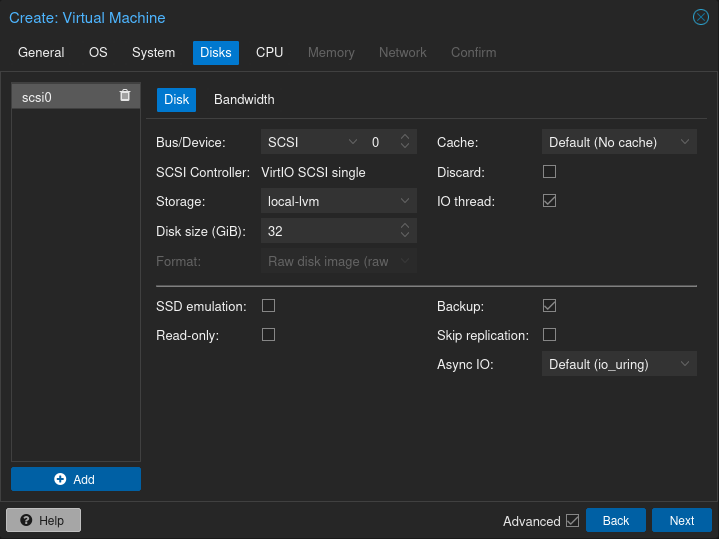
In disk settings, delete the default “scsi0” disk.

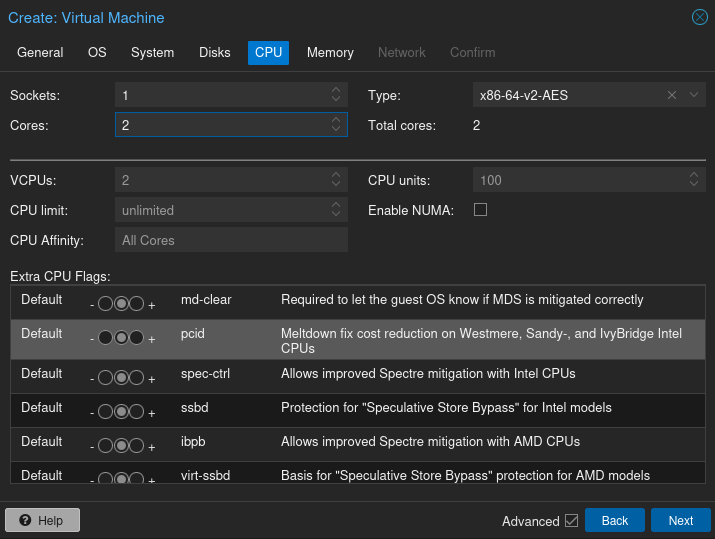
In CPU settings, give the VM as many cores as you see fit. I usually do two cores.
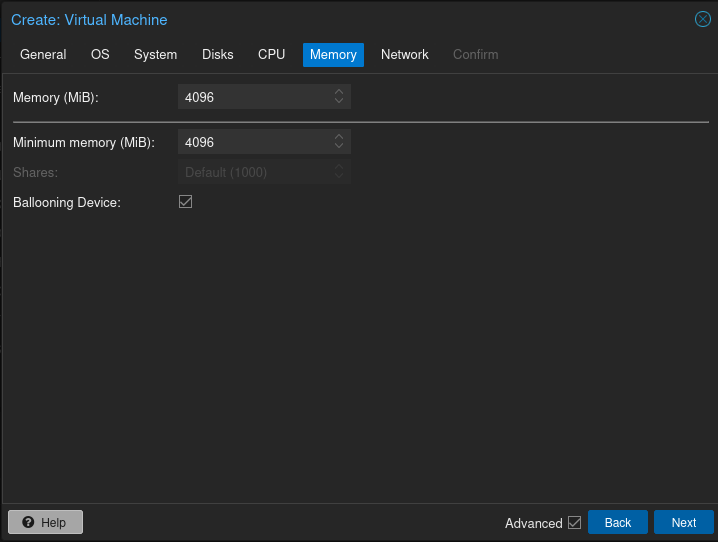
Do the same for memory. I find 4096 megabytes to be more than enough for most VMs.
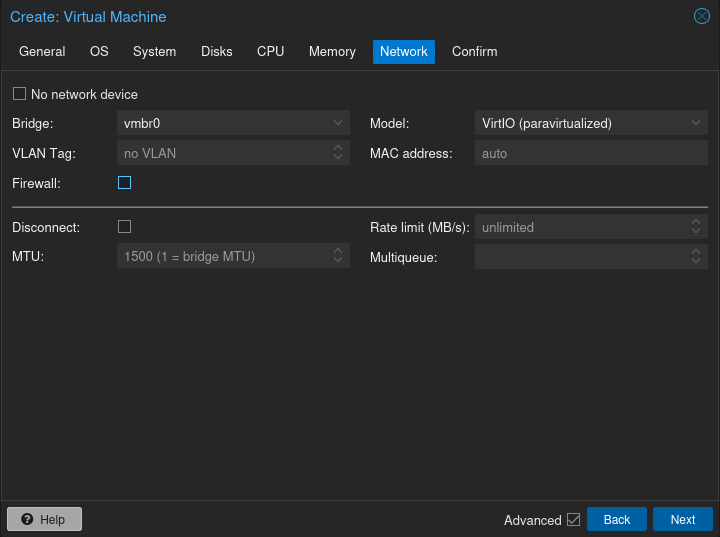
In the network settings, I disable the firewall. The Proxmox firewall allows all traffic by default, but if you add restrictive firewall rules, it defeats the entire point of these boxes–being insecure!
Finally, verify your settings on the confirmation page and click “Finish”.
Attaching the Disk Image
Now, you’ll need to manually upload and attach the disk image you created to the VM. Normally in Proxmox, you’d click on “local-lvm” under the cluster you want to upload ISOs to and upload it there, but that doesn’t seem to work with QCOW2s, so you’ll have to do it via command line. To open a shell, select your main node on the dashboard (“proxmox” in my case) and click “Shell” in the top right.

An interactive shell will open in another tab.
You’ll need to create a directory for your QCOW2 images to live. I made a folder under /var/lib/vz/template, because that’s where all the other disk images are. Next, you need to upload the QCOW2 image to the server. There are many ways to do this; I chose to serve it from my other VM over HTTP with python -m http.server 80.

Now attach the disk image to the VM you just made by specifying the VM ID. You did keep track of it, right? :^)
# qm importdisk 100 myjangow.qcow2 local-lvm
Importing disk 'myjangow.qcow2' to VM 100 ...
    Logical volume "vm-100-disk-0" created.
...
Successfully imported disk as 'unused1:local-lvm:vm-100-disk1'
Enabling the Disk
Now that the disk has been attached to the VM, you need to enable it and give it boot priority. Navigate back to the dashboard and select “100 (myjangow)” > “Hardware” > “Unused Disk 0”.
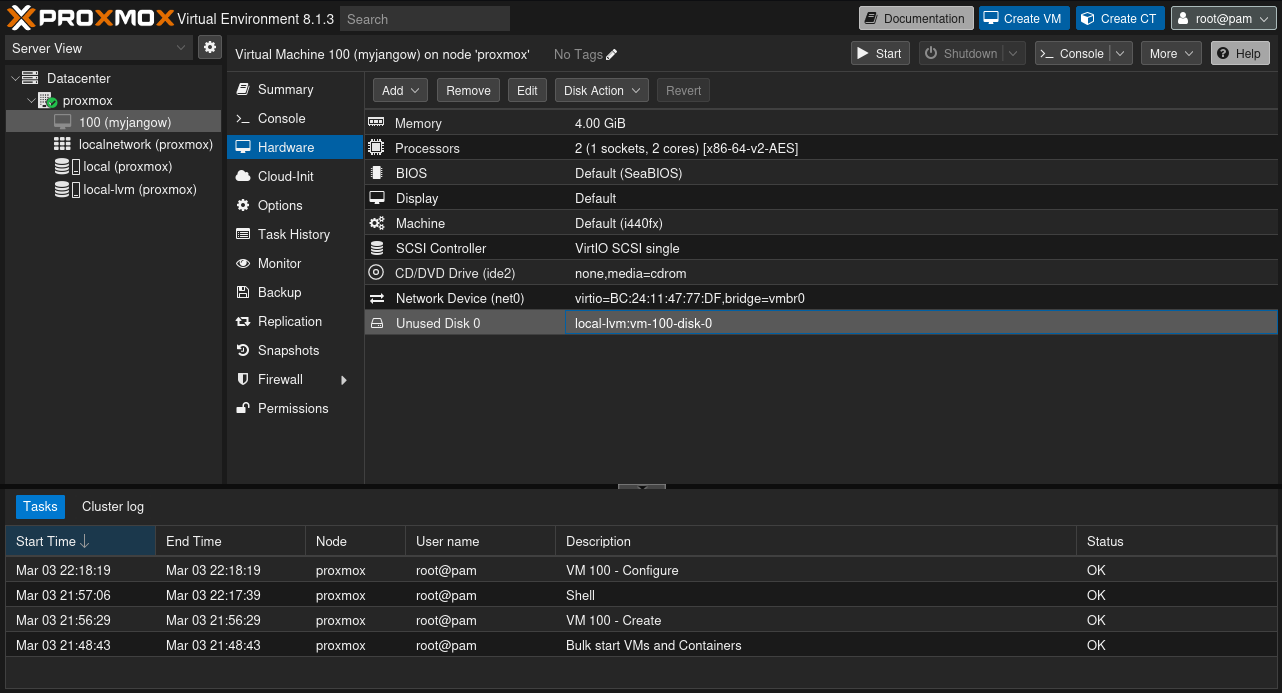
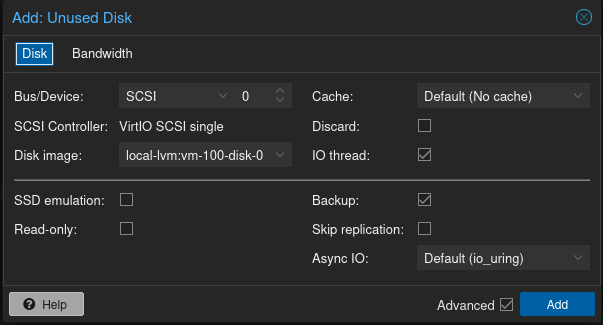
Press “Add” with the default settings.
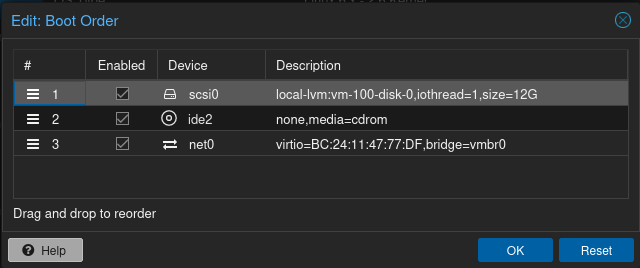
The previously unused disk will now show up as a virtual SCSI device. Now go to “100 (myjangow)” > “Options” > “Boot order”.
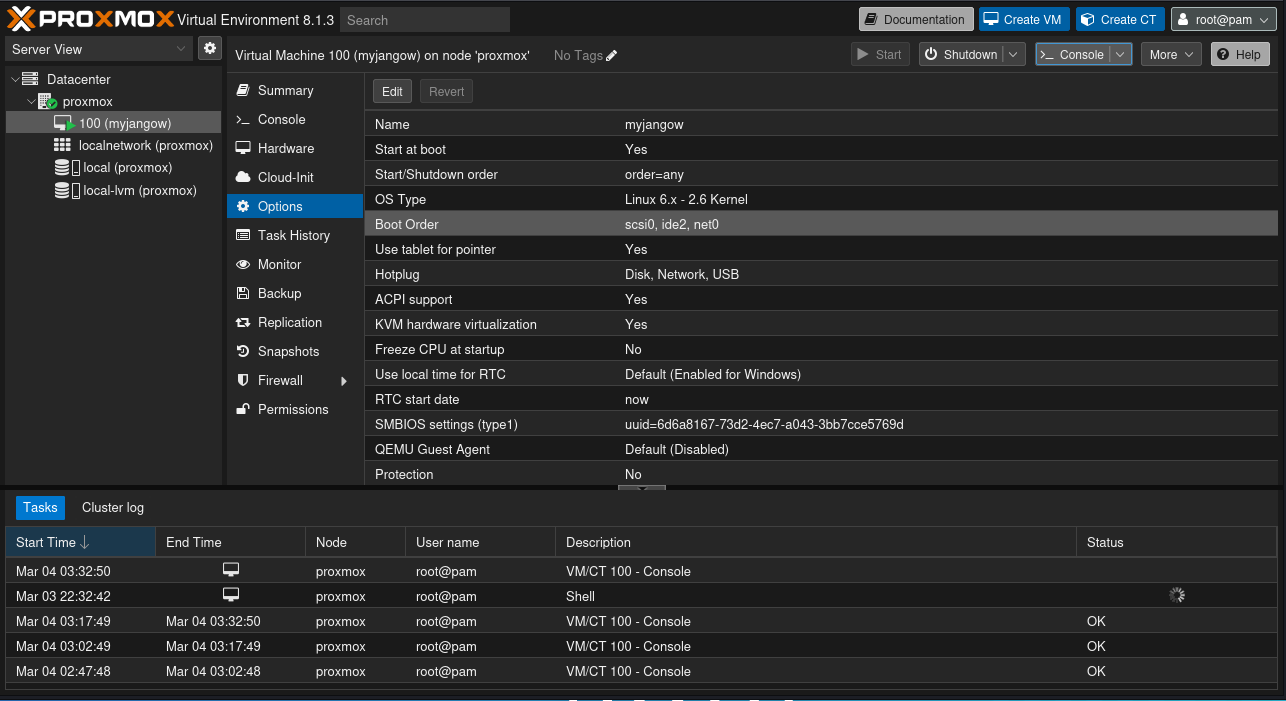
Enable the “scsi0” device and drag it to the top of the boot order.
Now boot the VM. If you’ve done everything right, it will boot to the TTY login, and you can log in using root:root!

Configuration Checklist
You might immediately notice some problems with Jangow. First off–it’s in Portugese. The keymap is also incorrect. Typing a forward slash echoes back a semicolon. Every box is different, and these are just a few of the problems you might have to fix!
Fix Keymap
Type loadkeys en_US to fix the keymap for the sessions, assuming you’re on a 104-key ANSI keyboard. To permanently change the keymap on Debian-based systems, run dpkg-reconfigure keyboard-configuration.
Change Language
Run dpkg-reconfigure locales to change the system language. Additionally, set all the values in /etc/default/locales to your target locale.
Change Root Password
This one is up to you. I say it’s the responsibility of the blue teamers to set a good root password or disable root login entirely! Just run passwd as root if you decide you want to change it.
Configure SSH
In /etc/ssh/sshd_config, make sure that PasswordAuthentication yes and PermitRootLogin yes are set so blue team can log in.
Disable Firewall
Disable the firewall configured, if any. It’s blue team’s responsibility to fix it and not lock themselves out of SSH in the process!
sudo ufw disable
Fix Networking
In the service status messages on boot, you may have noticed “Failed to raise network interfaces”. You have to change the network configuration to look for the correct interface name provided by the VM host. How you do this really depends on the guest VM OS. Anyways, you can find your interface name with ip a. On Proxmox, it’s usually ens18.
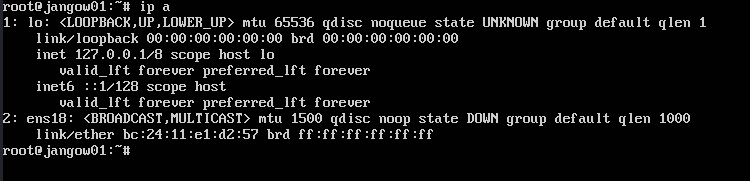
You can usually find your network configuration in /etc/network/interfaces or /etc/systemd/network/[two-digit number]-[interface name].network. Replace every occurrence of the old interface name with the new interface name, make sure DHCP is enabled, restart the networking service, and verify it works by pinging some server. Run ip a again to find the new IP address you’ll give to the red and blue teamers.
Backups!
All changes made to the virtual machine will save to the disk image. You don’t want red teamers (and blue teamers, sometimes) wreaking havoc on a box you spent such a long time configuring, so make sure to back it up.
Future Ideas
This is a great start for a red vs blue network, but I’d like to make some improvements in the future. For one, I want to have the VMs managed by a virtualized firewall. This is achievable–it’s what I do on my home network–but firewalls like pfSense will complain if your hardware doesn’t have enough network interface cards. This could probably be solved with smarter virtual network configuration.
Like I mentioned earlier, I definitely want to get a Windows Active Directory network hosted as well. I saw a statistic floating around that 95% of Fortune 500 companies use AD as a major authentication mechanism. Honestly, I thought it would be higher, which is why I think it’s criminal that many universities don’t have any AD in their curriculum.
With this guide, go off and make your own red vs blue training network! Please let me know if you have any suggestions. Have fun, and happy hacking!